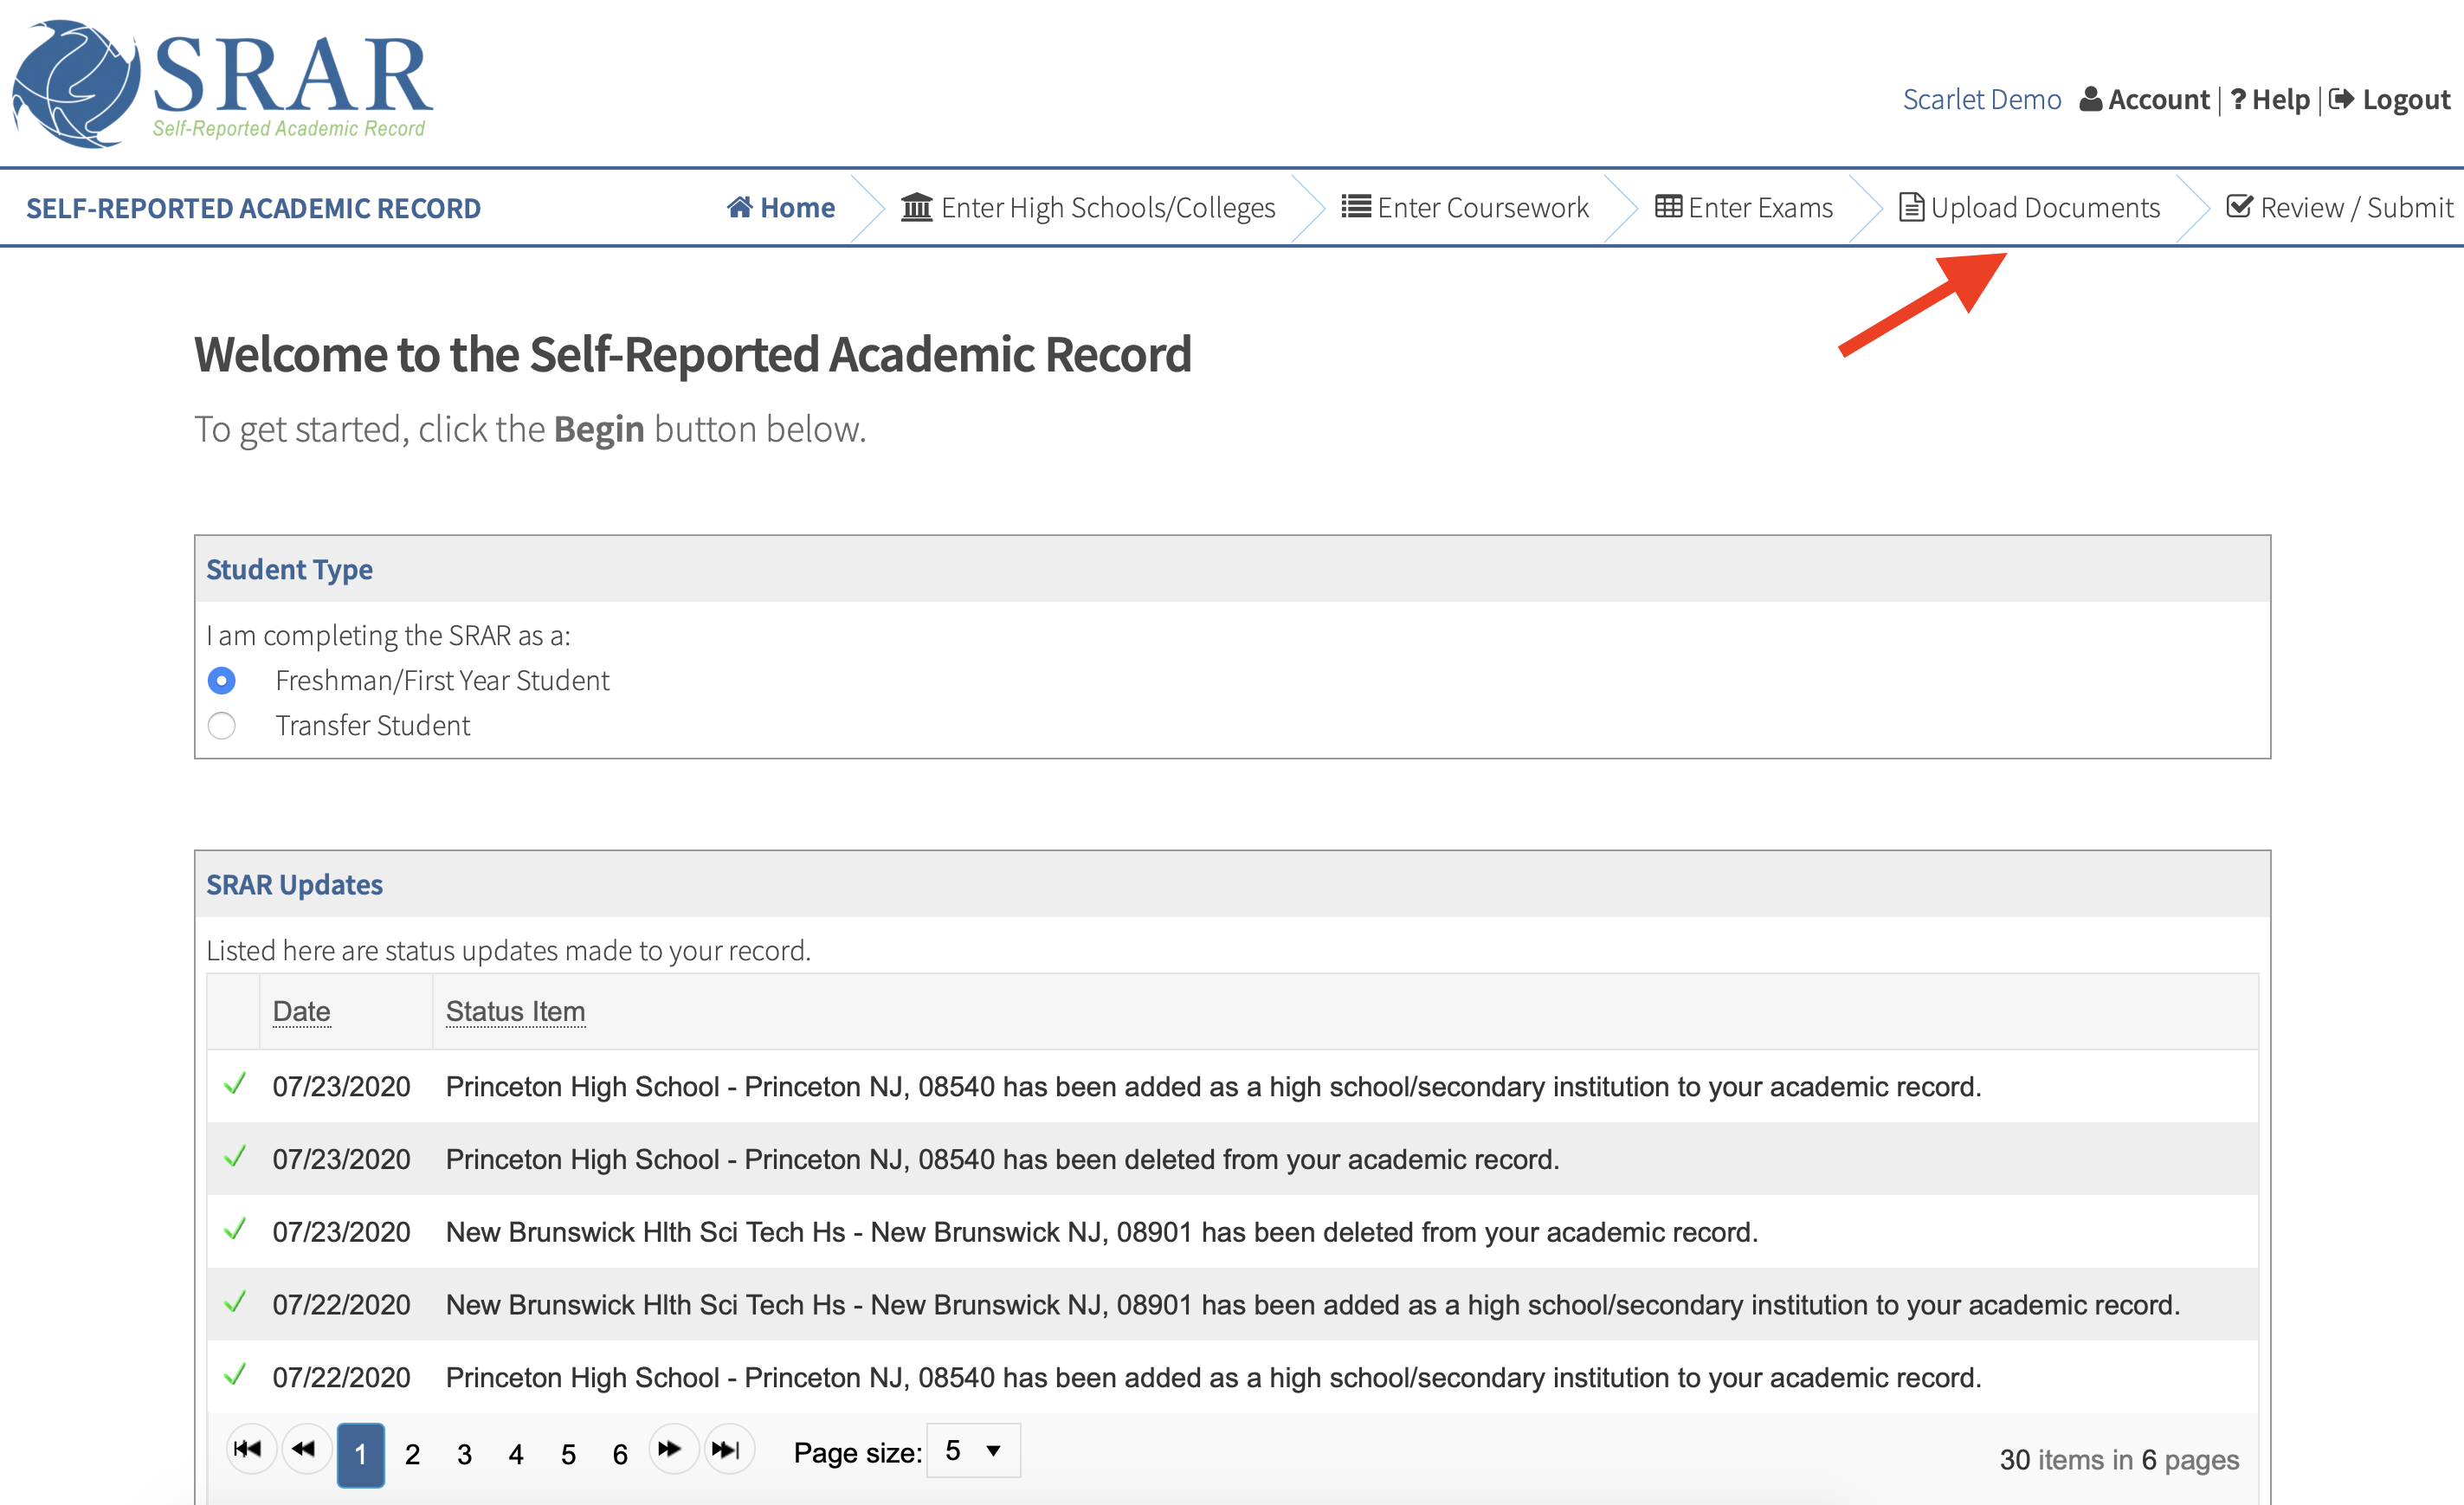
The upload document tab will only appear in the navigation menu if a college or university allows students to upload documents. We recommend checking the steps to applying page to determine if the school to which you are applying has enabled this feature.
- To upload documents, log in to the university's SRAR and navigate to the Upload Documents tab.
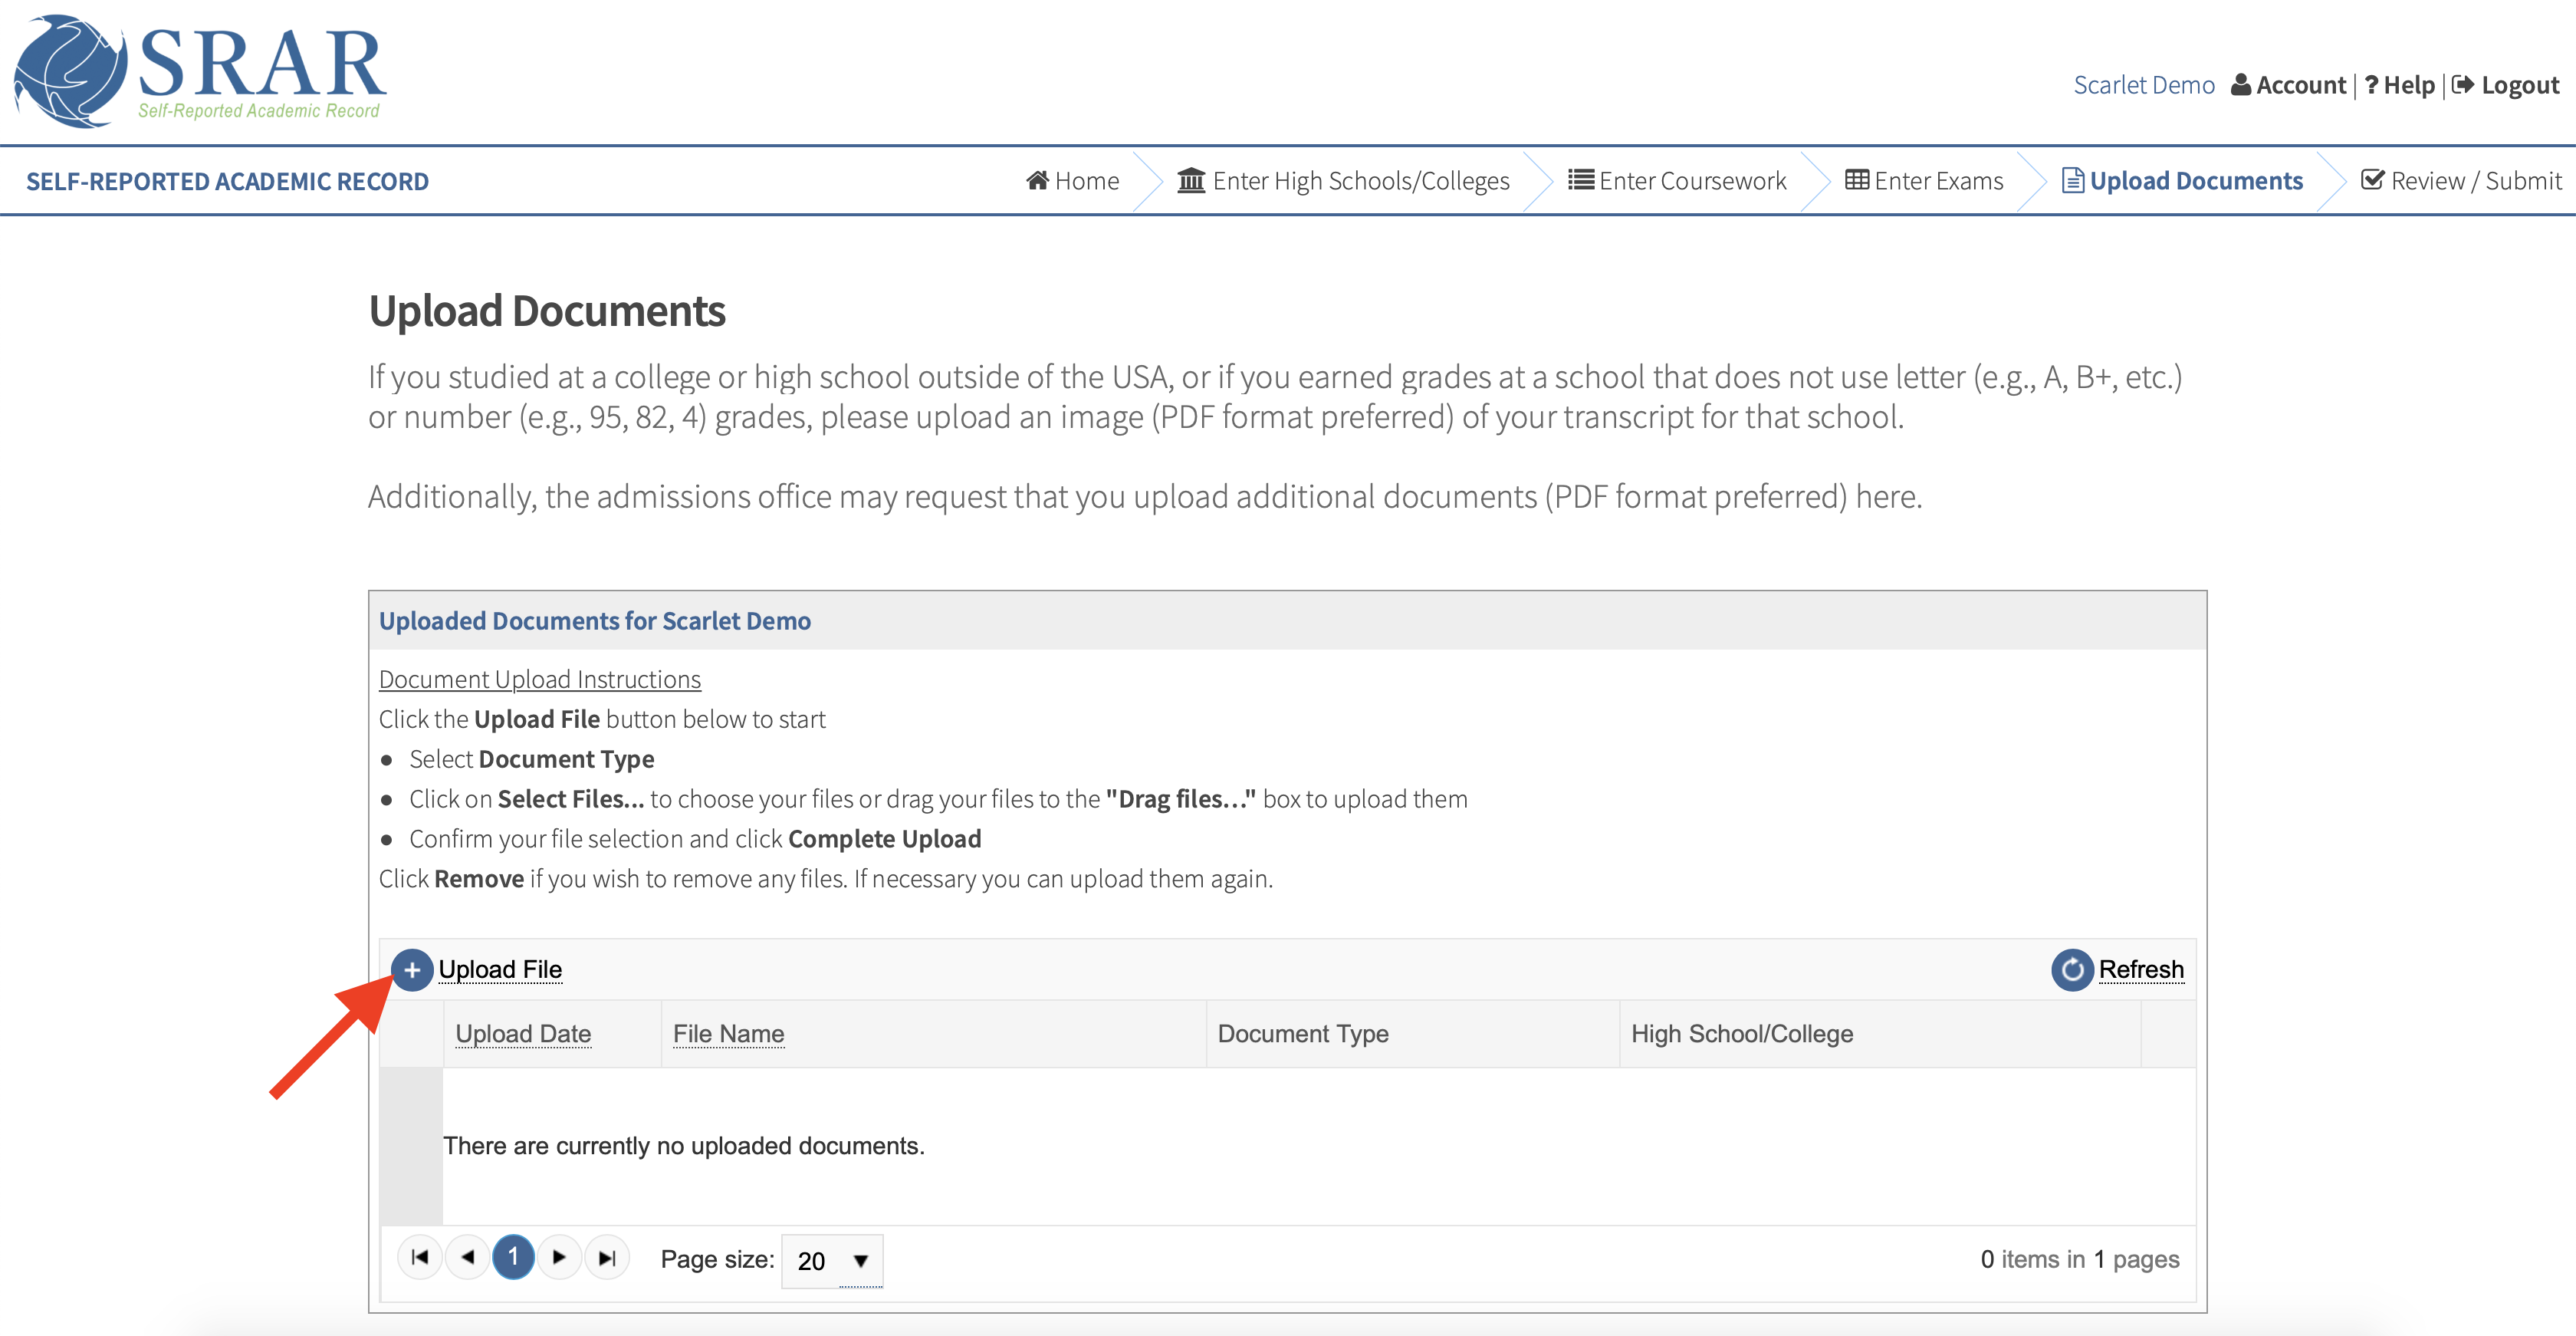
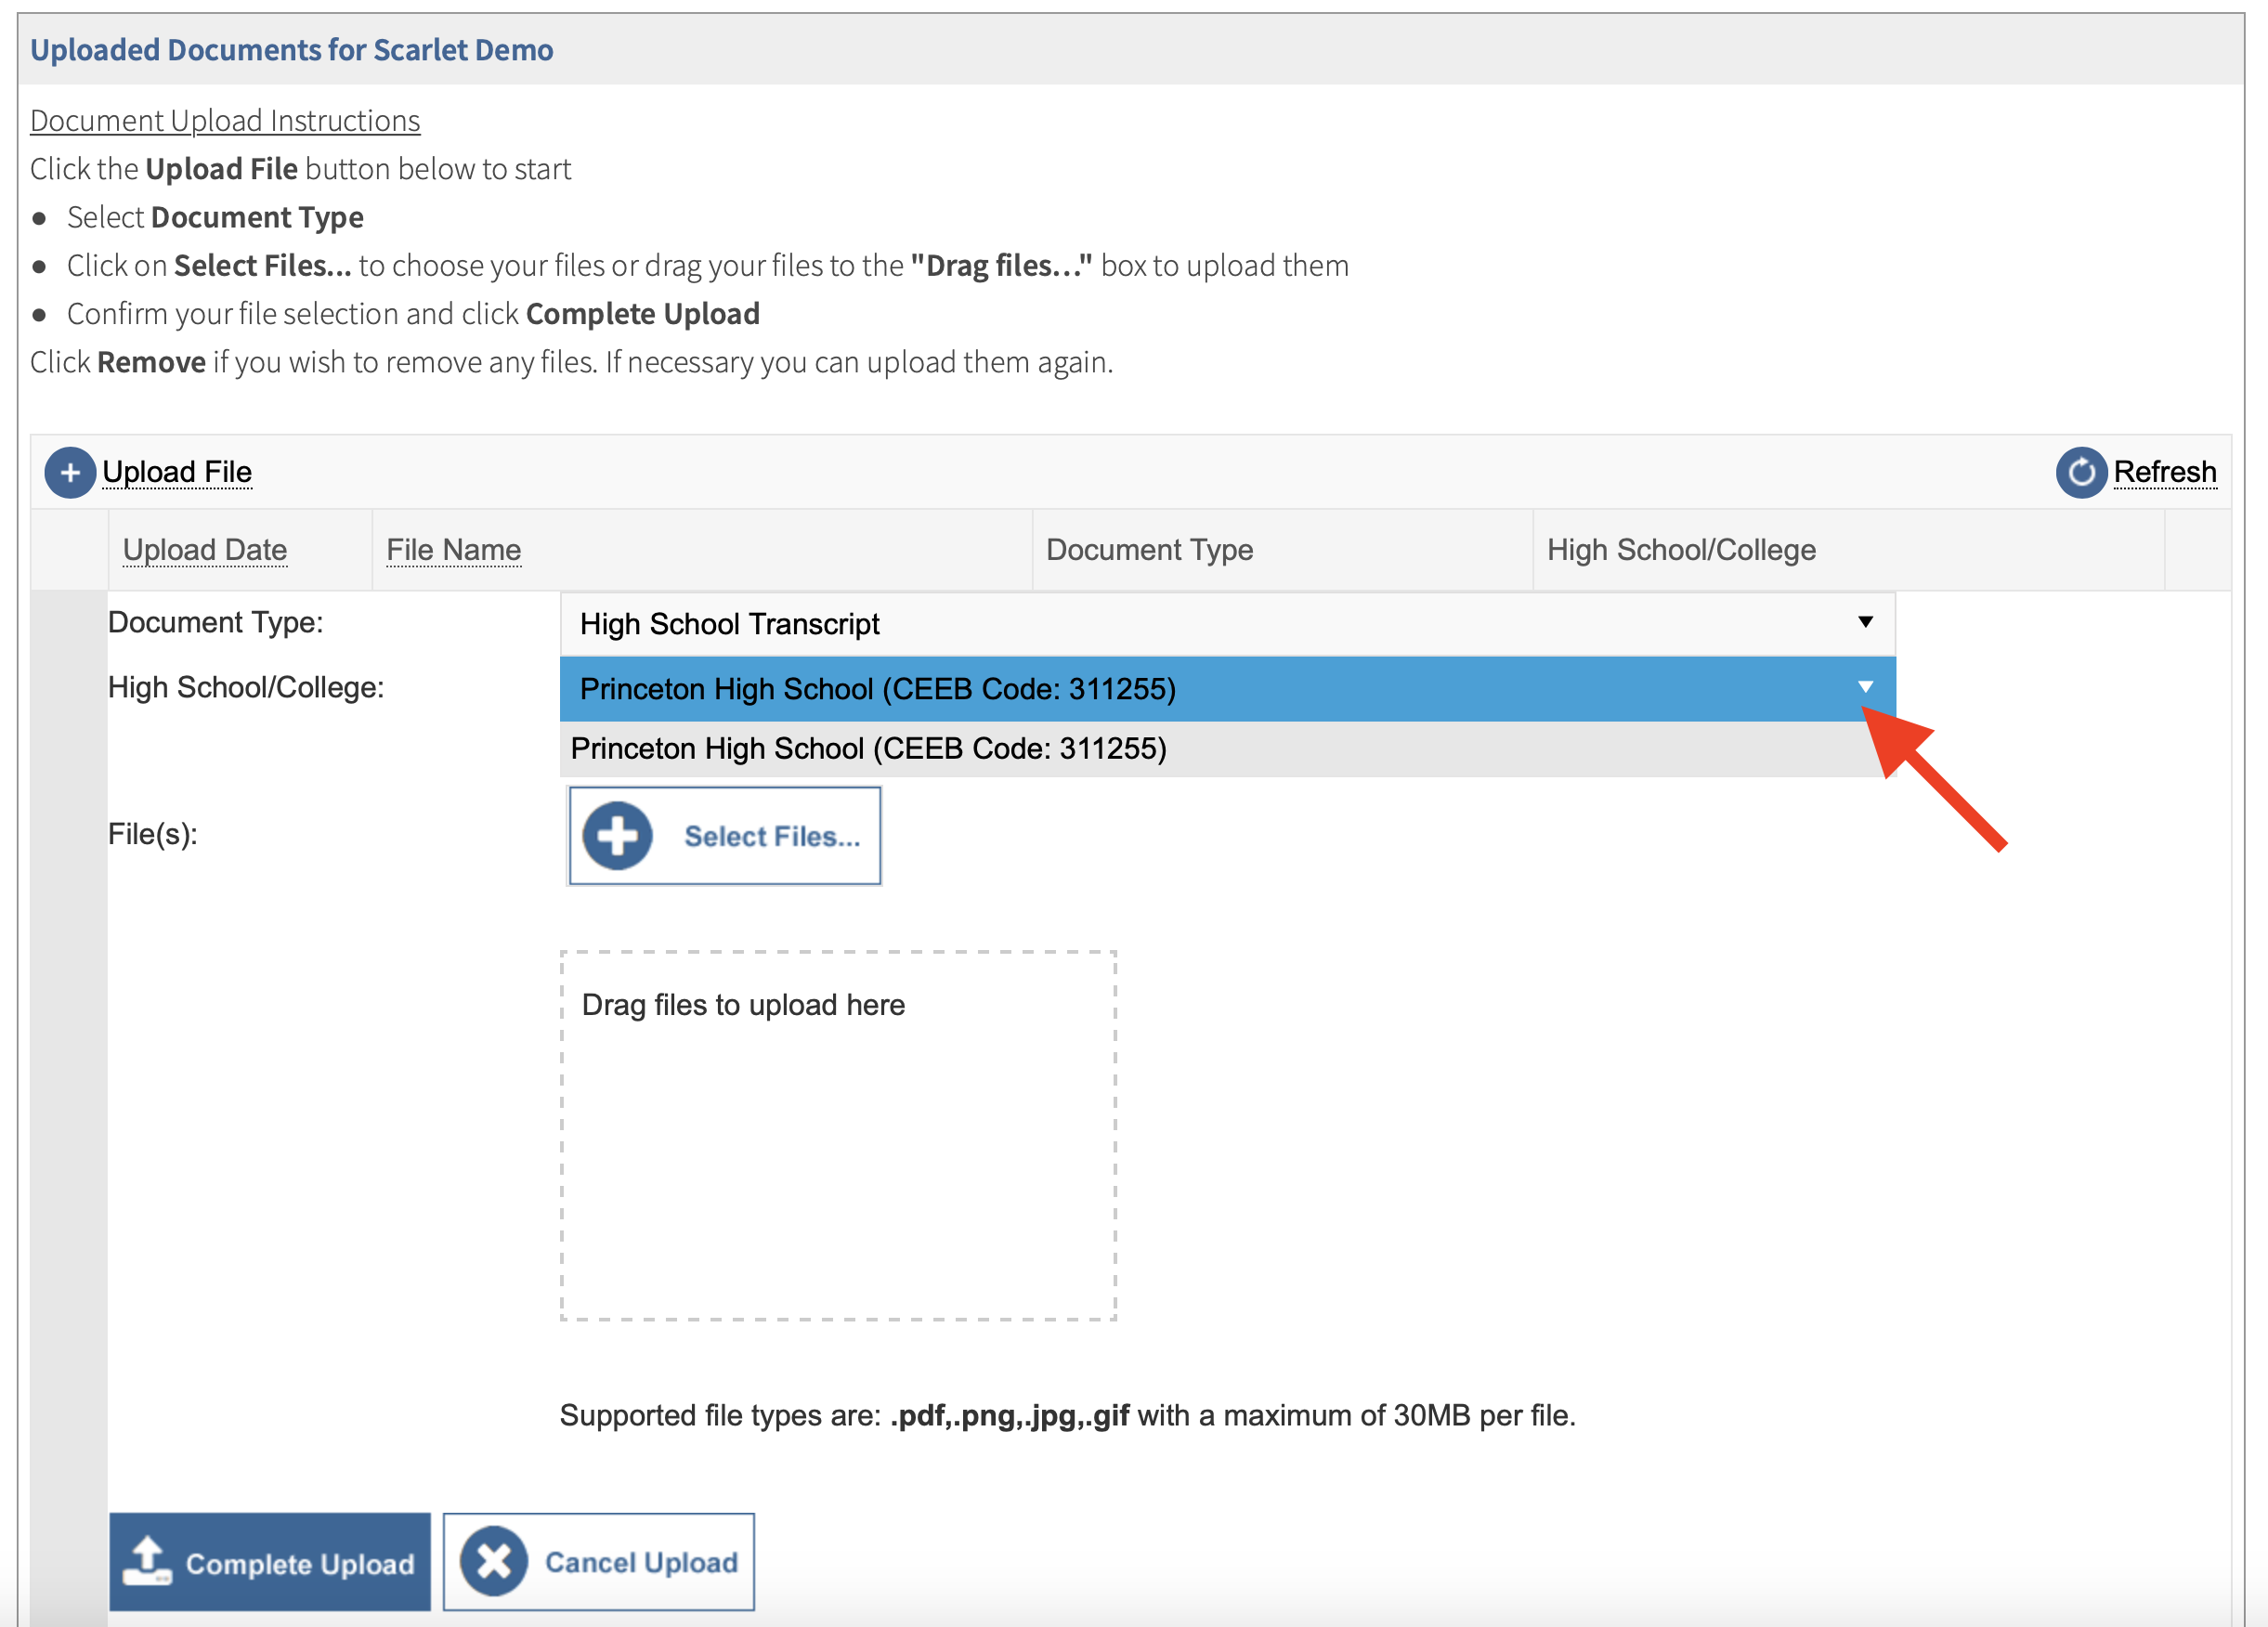
Note: The screen above will appear slightly different depending on the school. - On the Document Upload Utility screen, click Upload File.
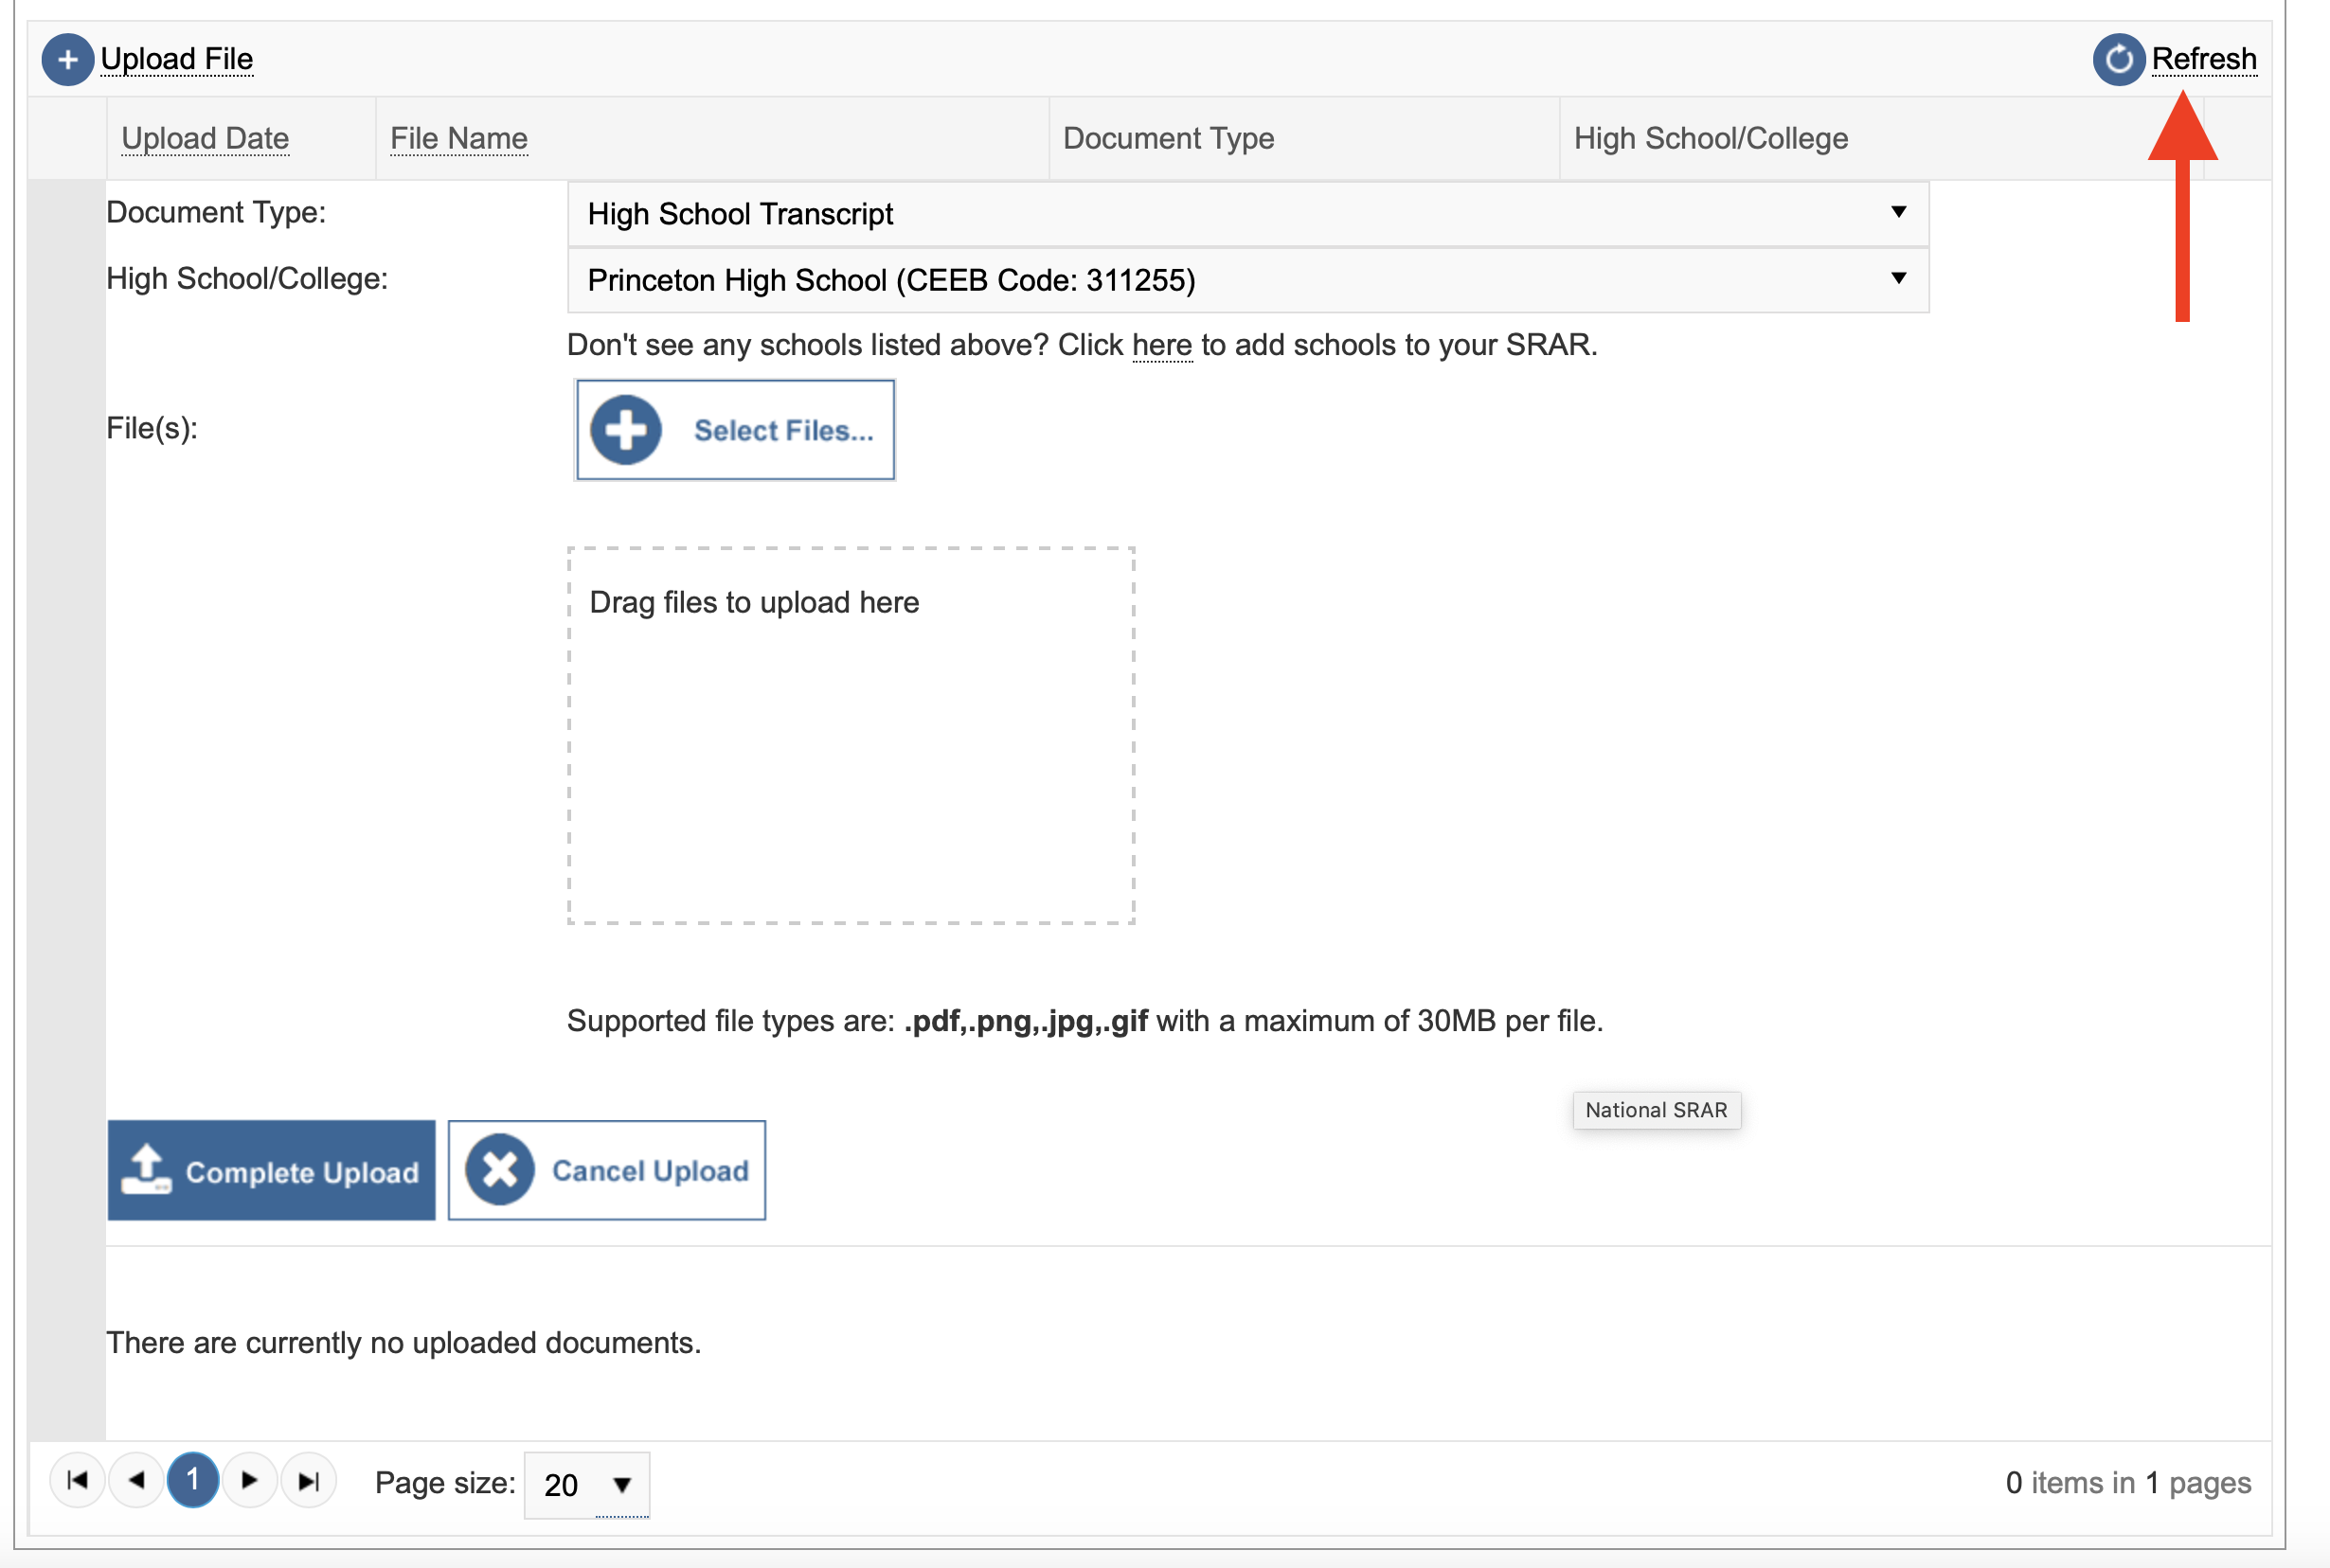
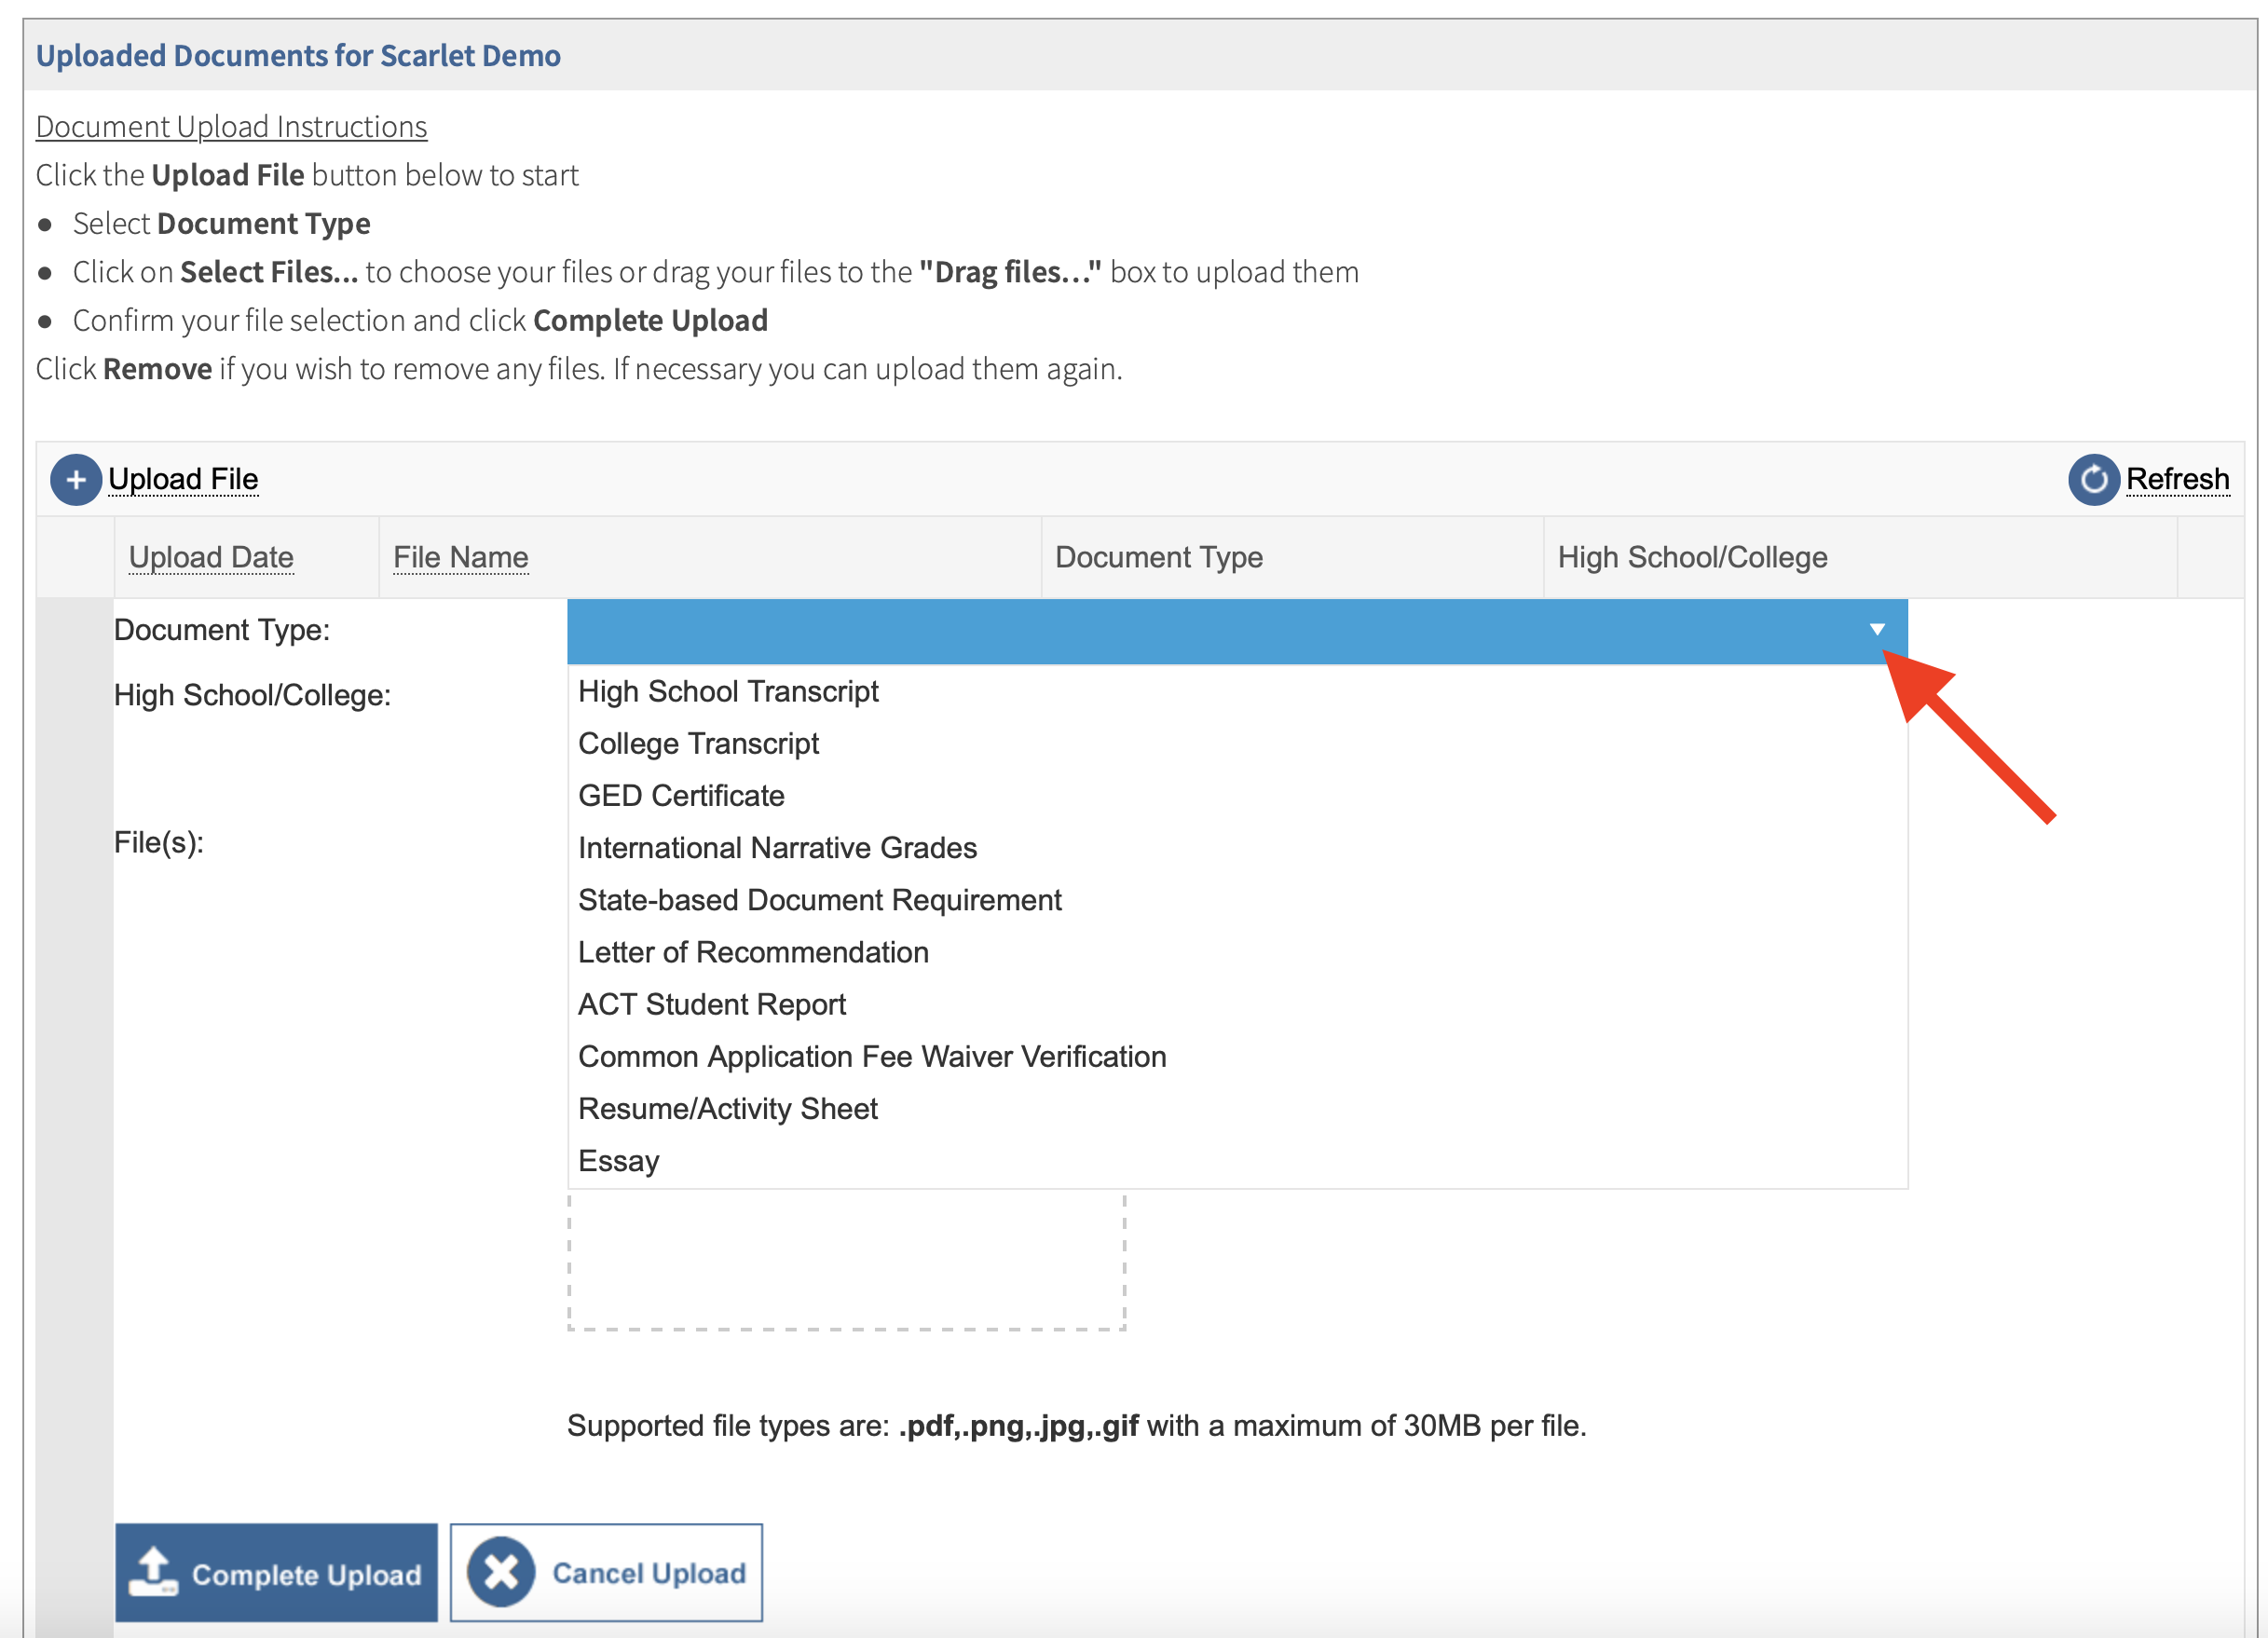
- Select the type of document you are uploading from the Document Type drop-down menu (e.g., Transcript).
- Select your High School/College from the High School/College drop-down menu.
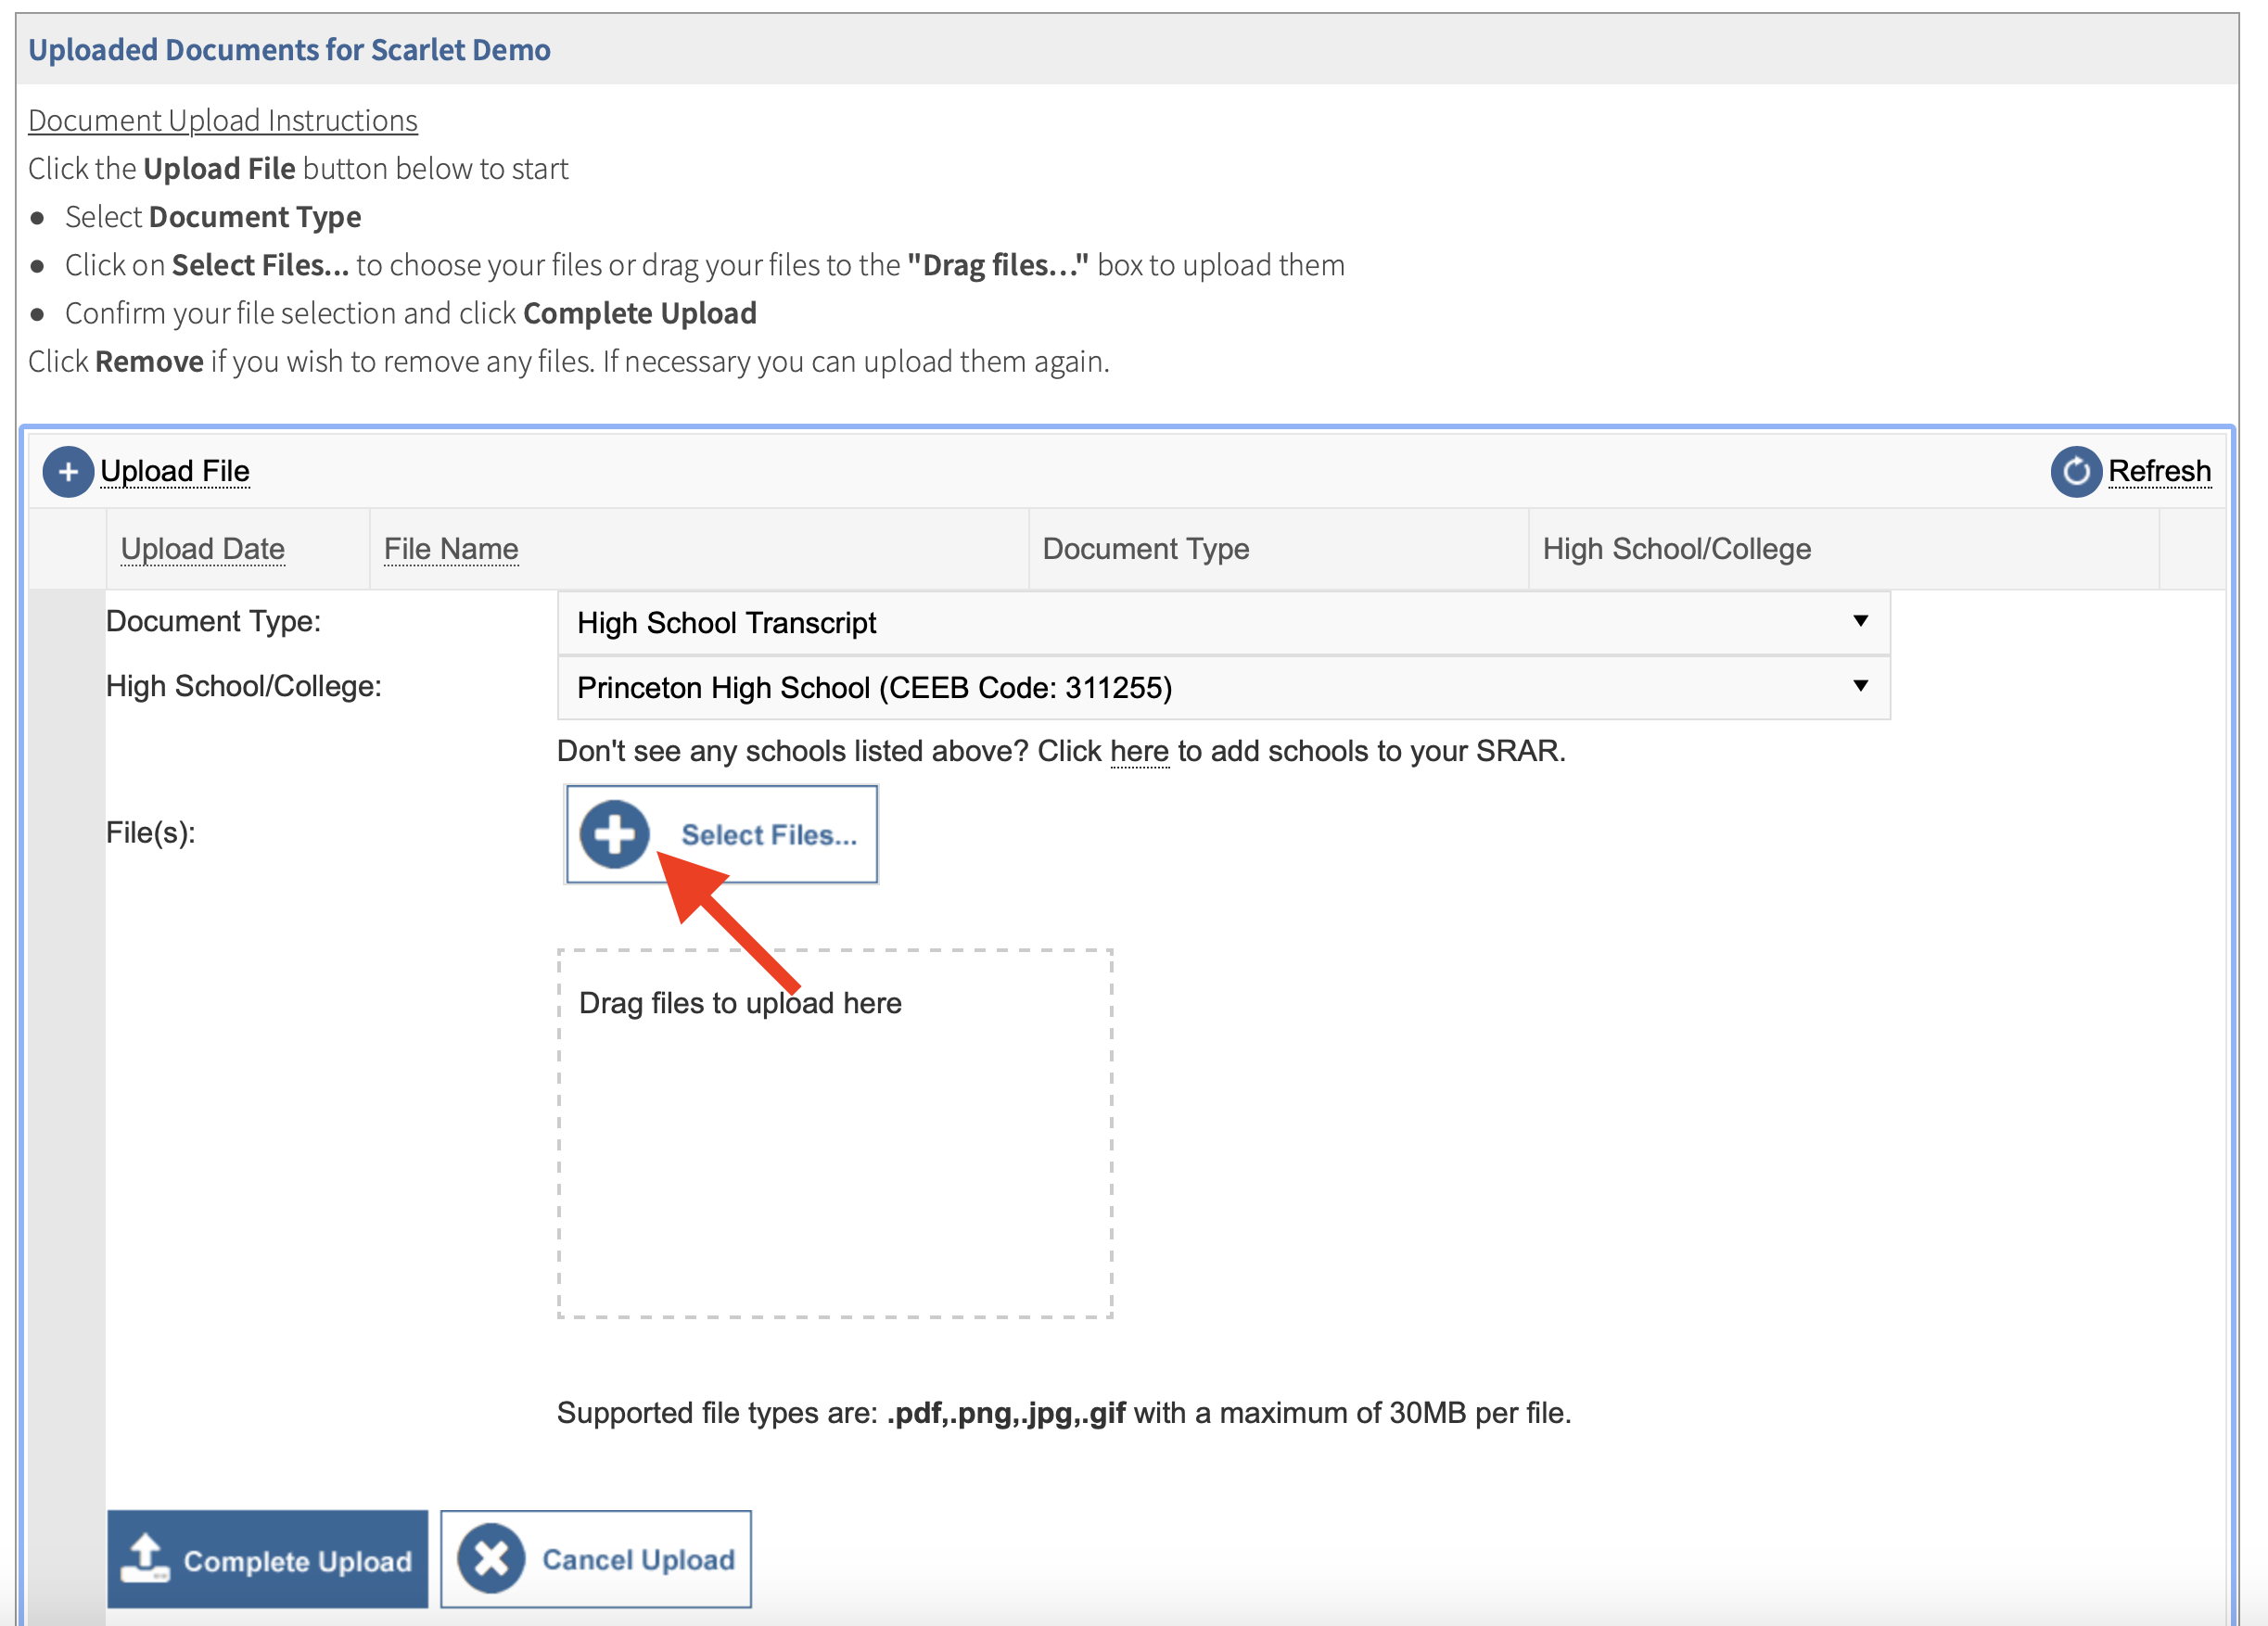
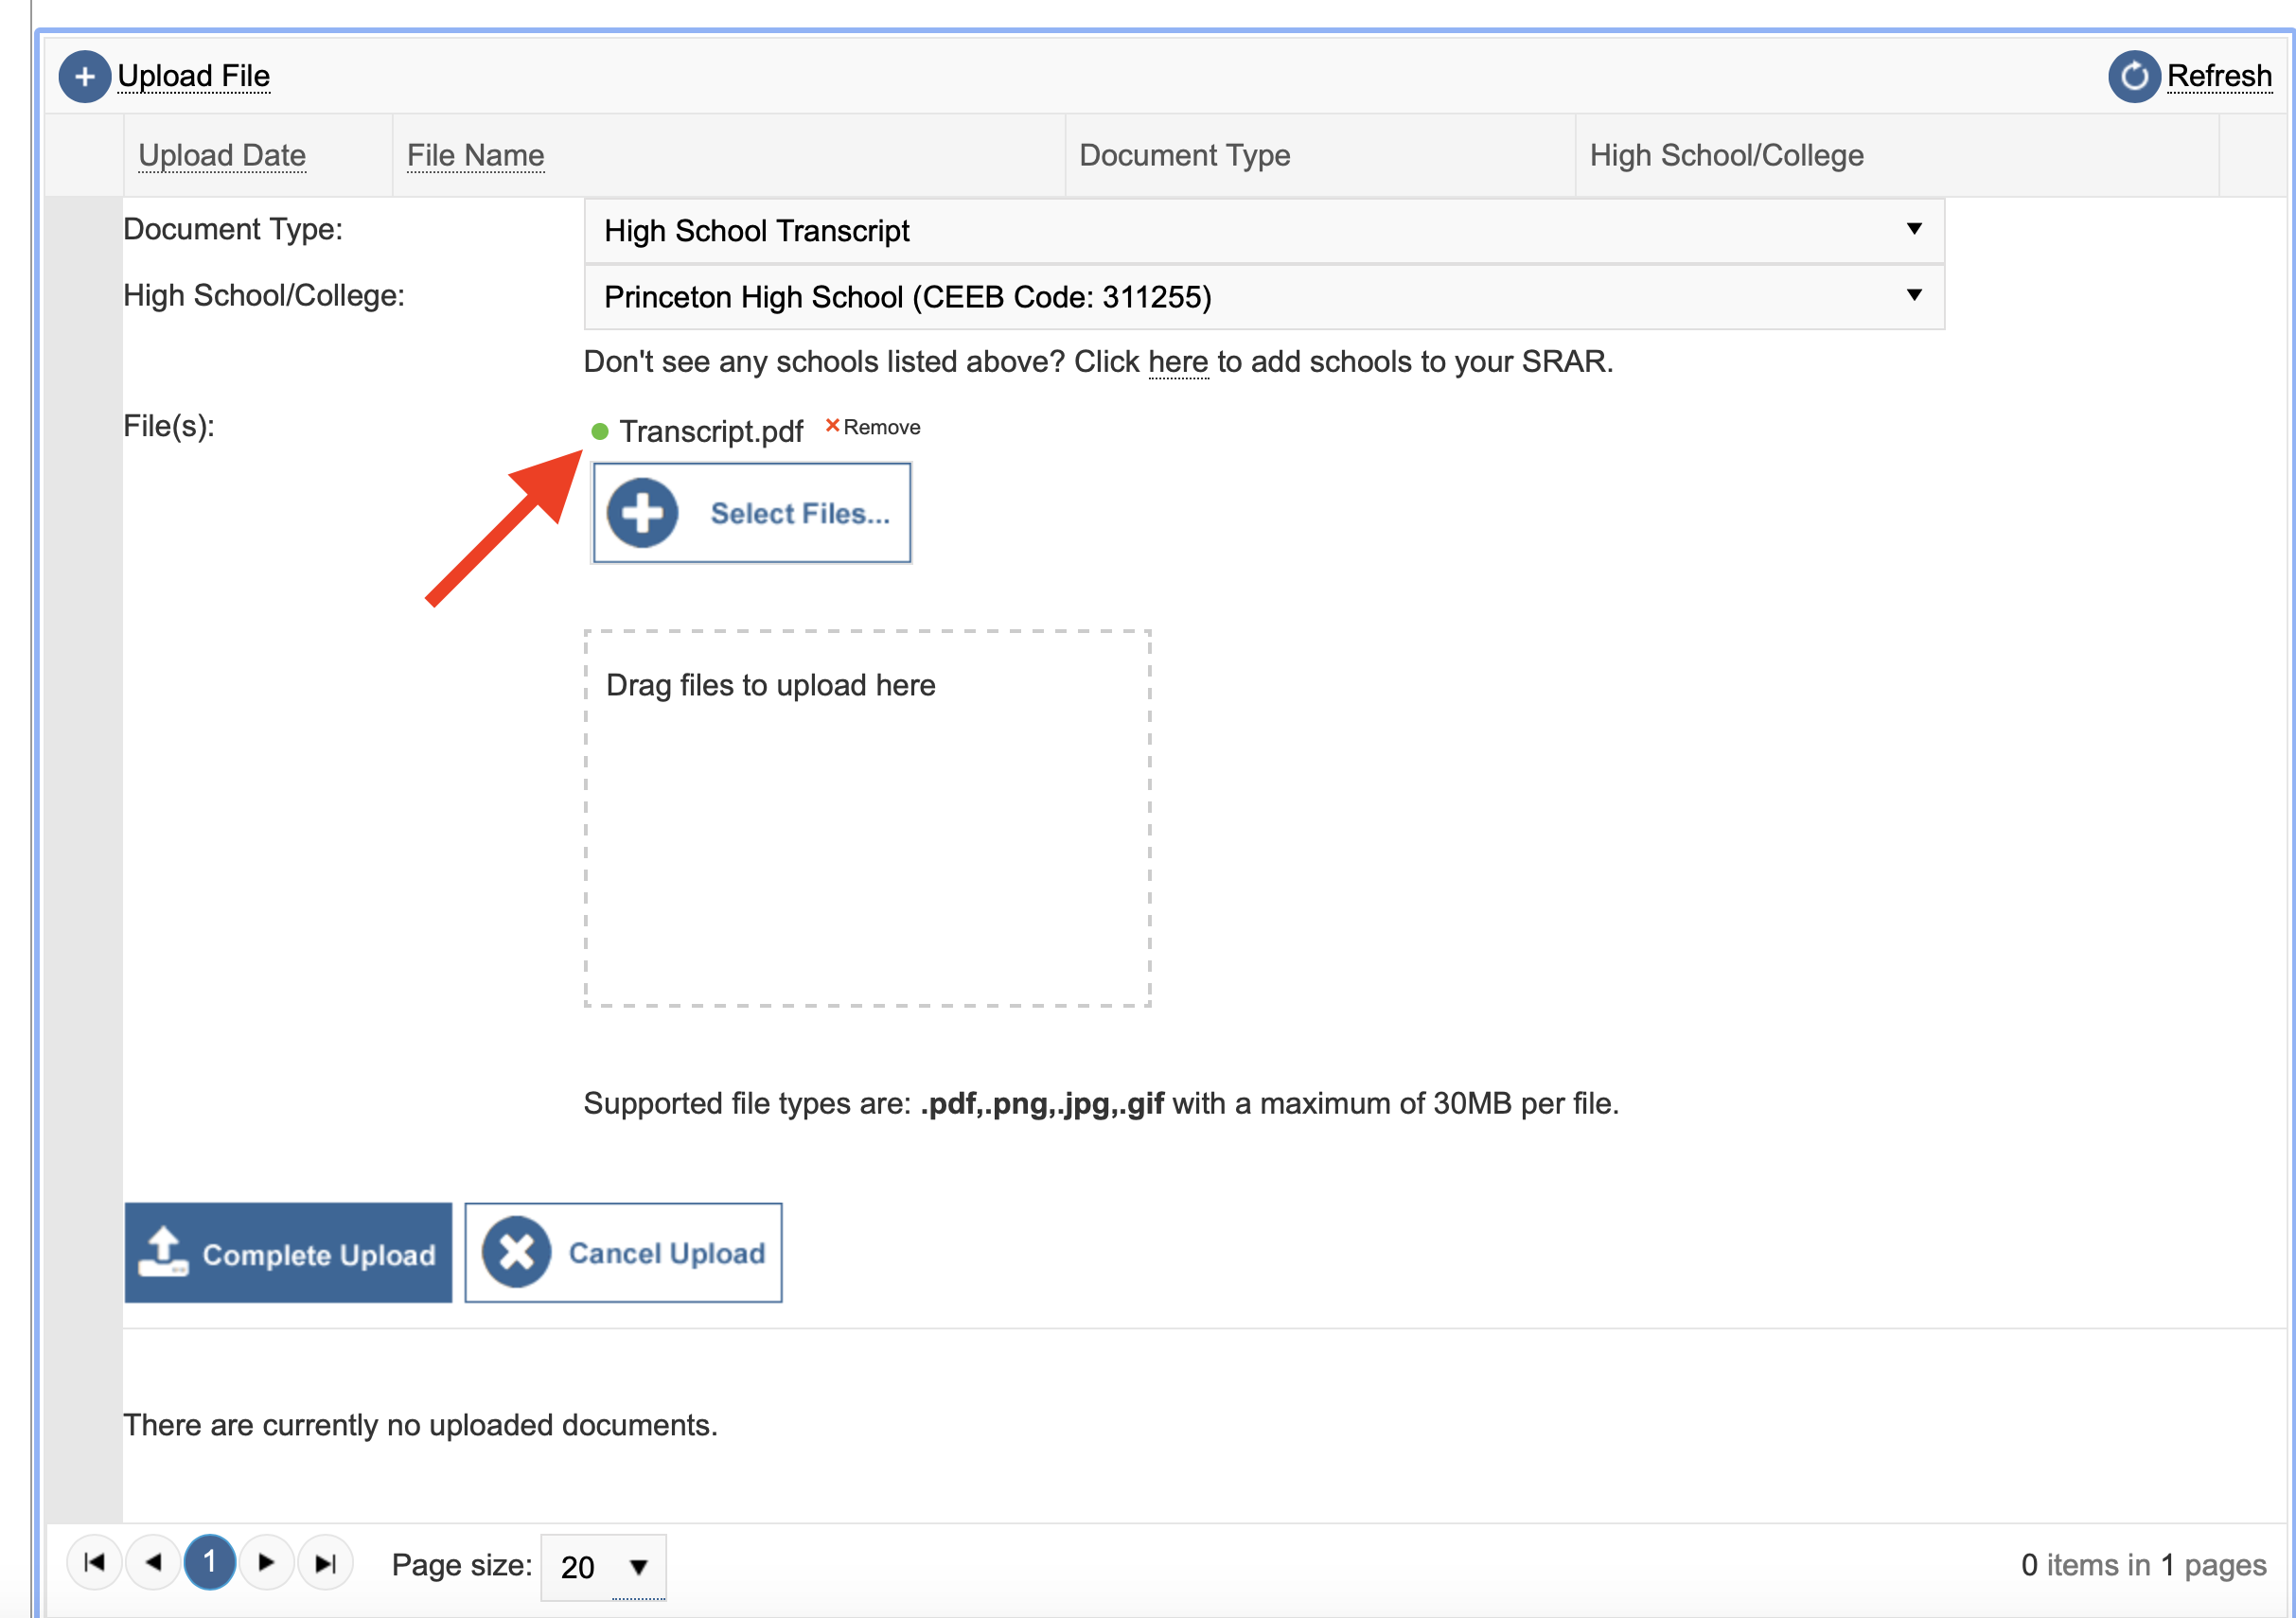
- Click Select Files and choose the file from your device. Alternatively, you can also drag a file to the box to upload.
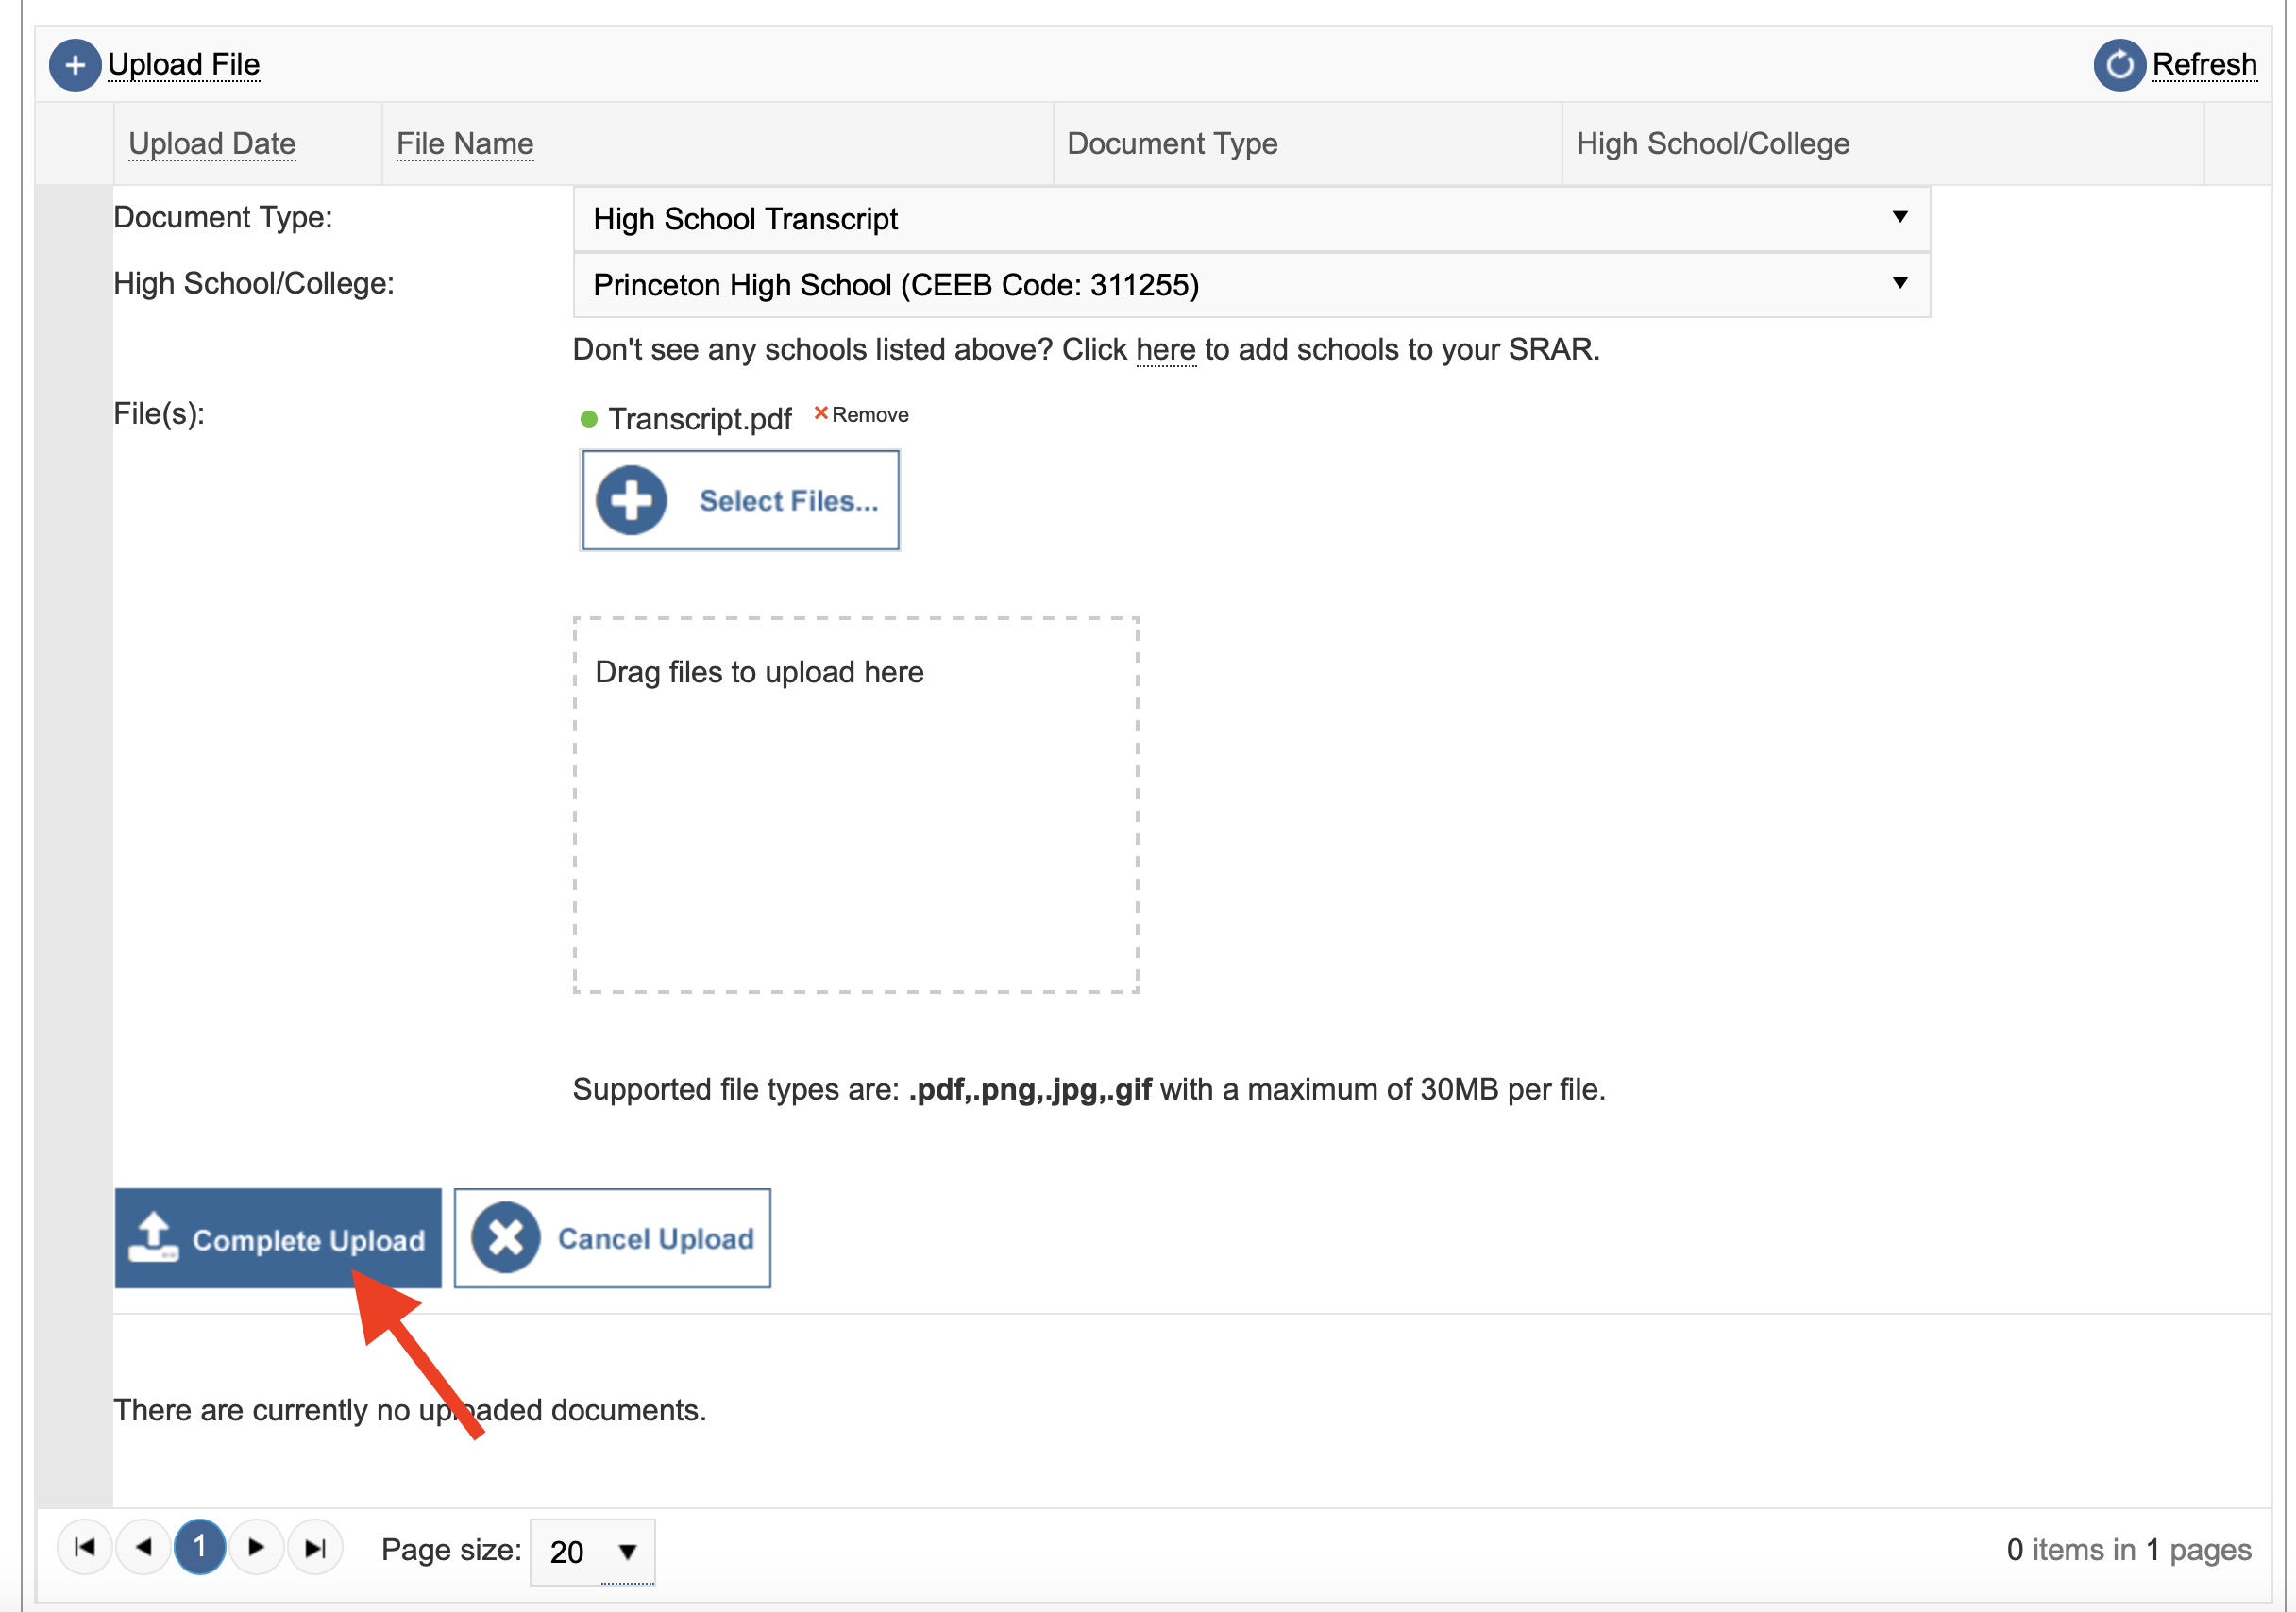
- Click Complete Upload to upload your document successfully.
- Your document will appear on screen.
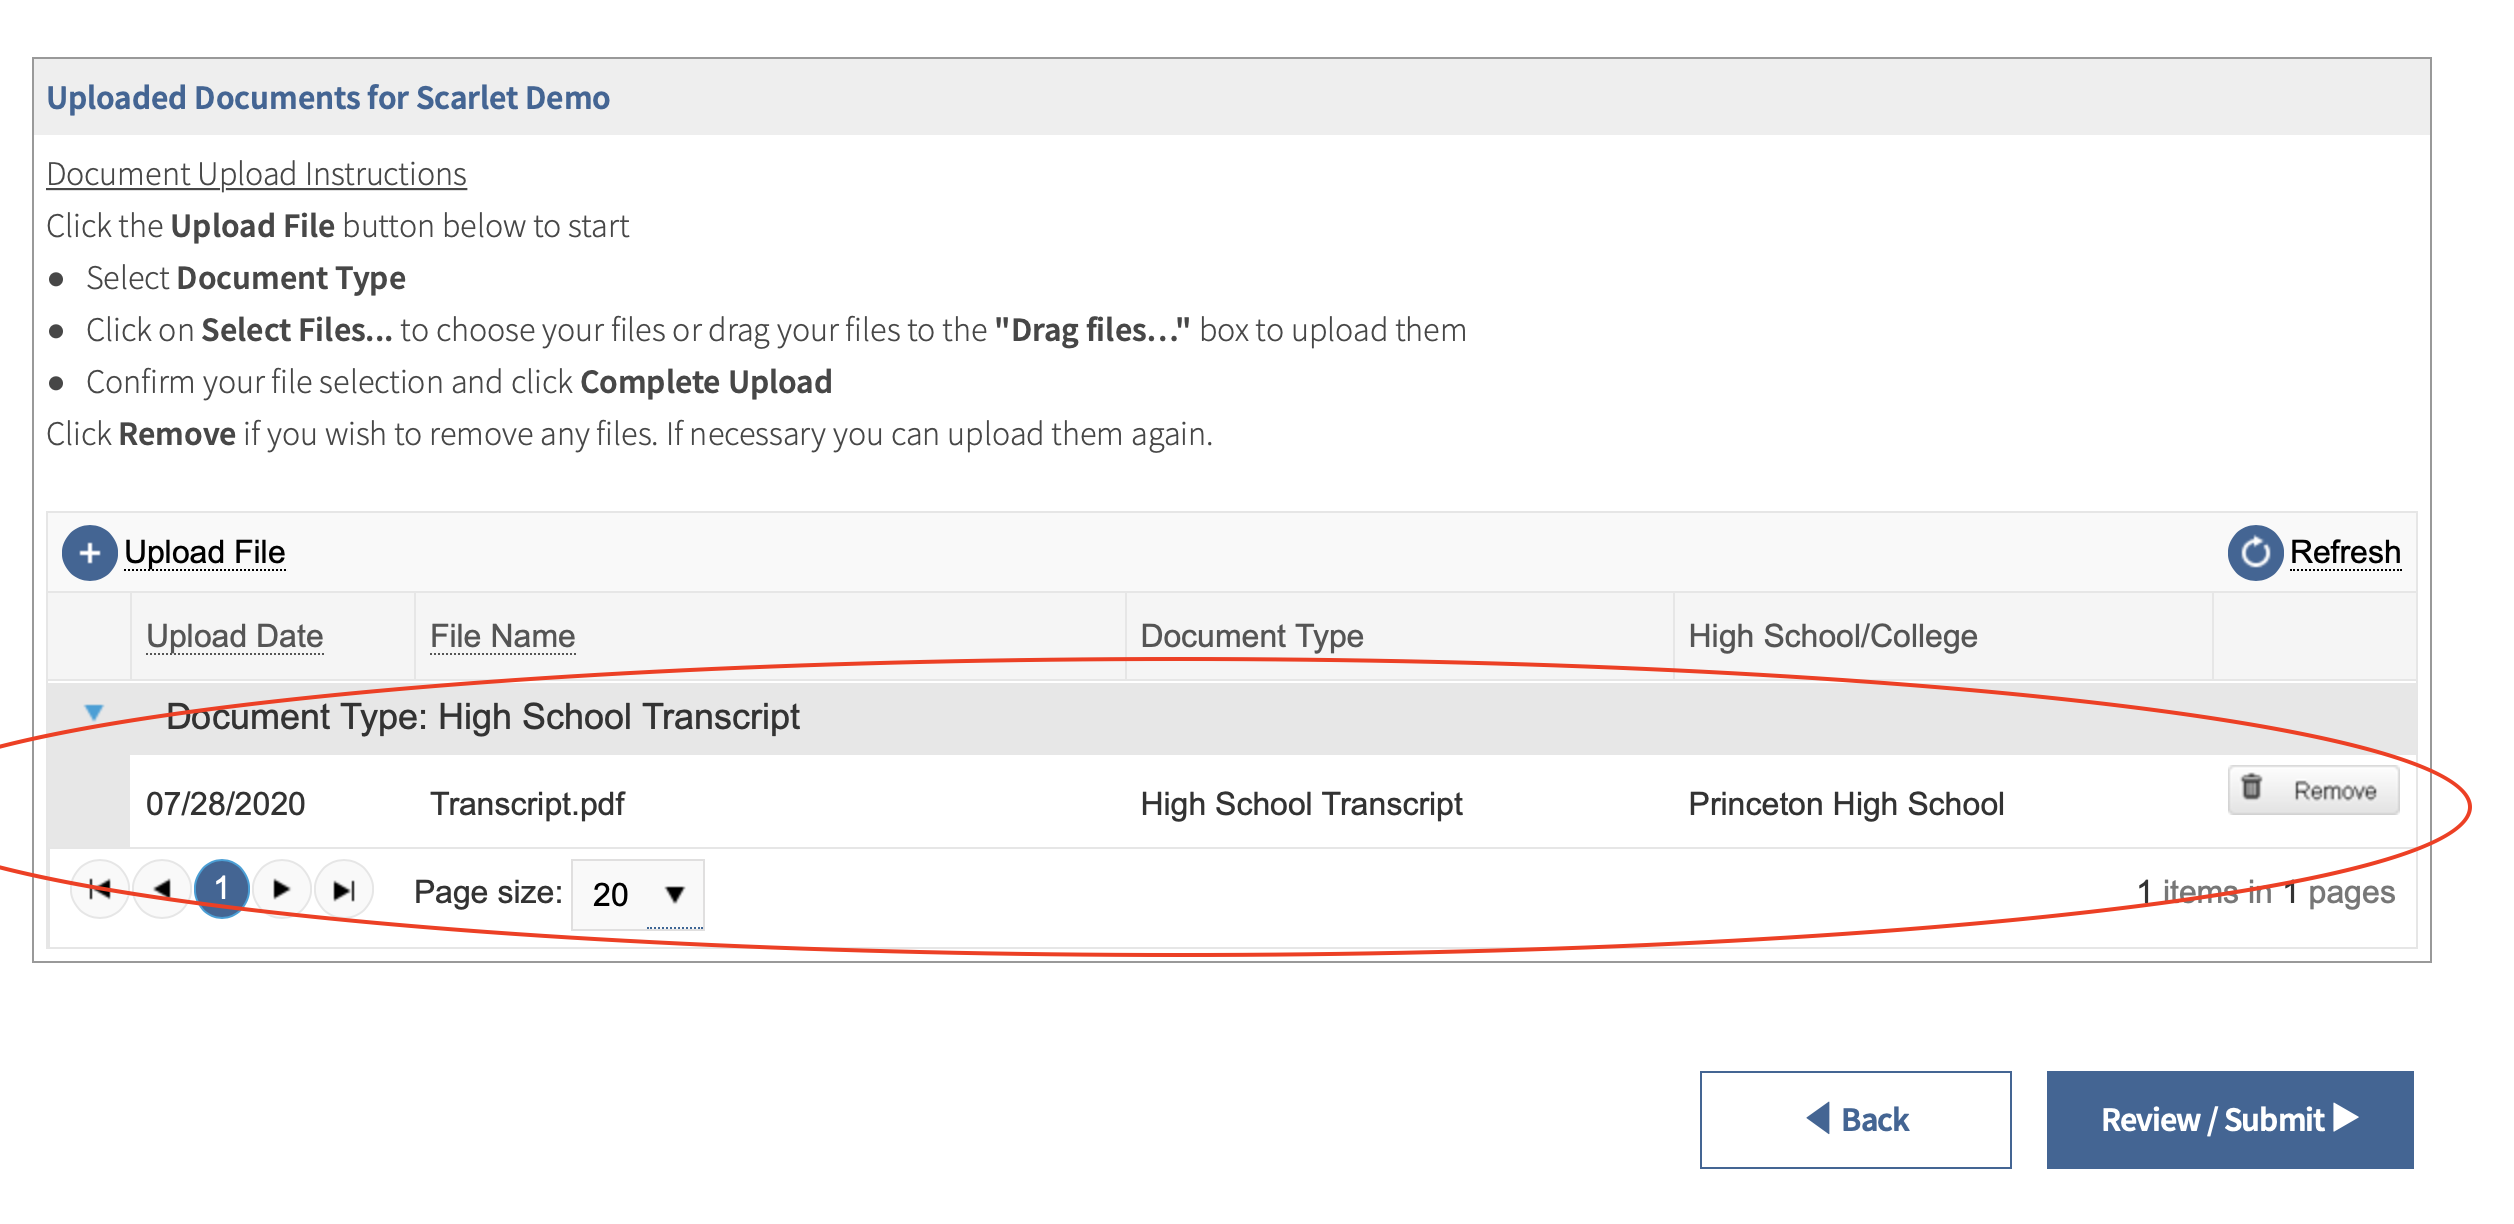
- To upload another document, repeat steps 2-6 above.
Helpful Tips:
- After selecting a file from your computer, confirm there is a green circle next to the file on screen. A green circle indicates you have selected a supported document.
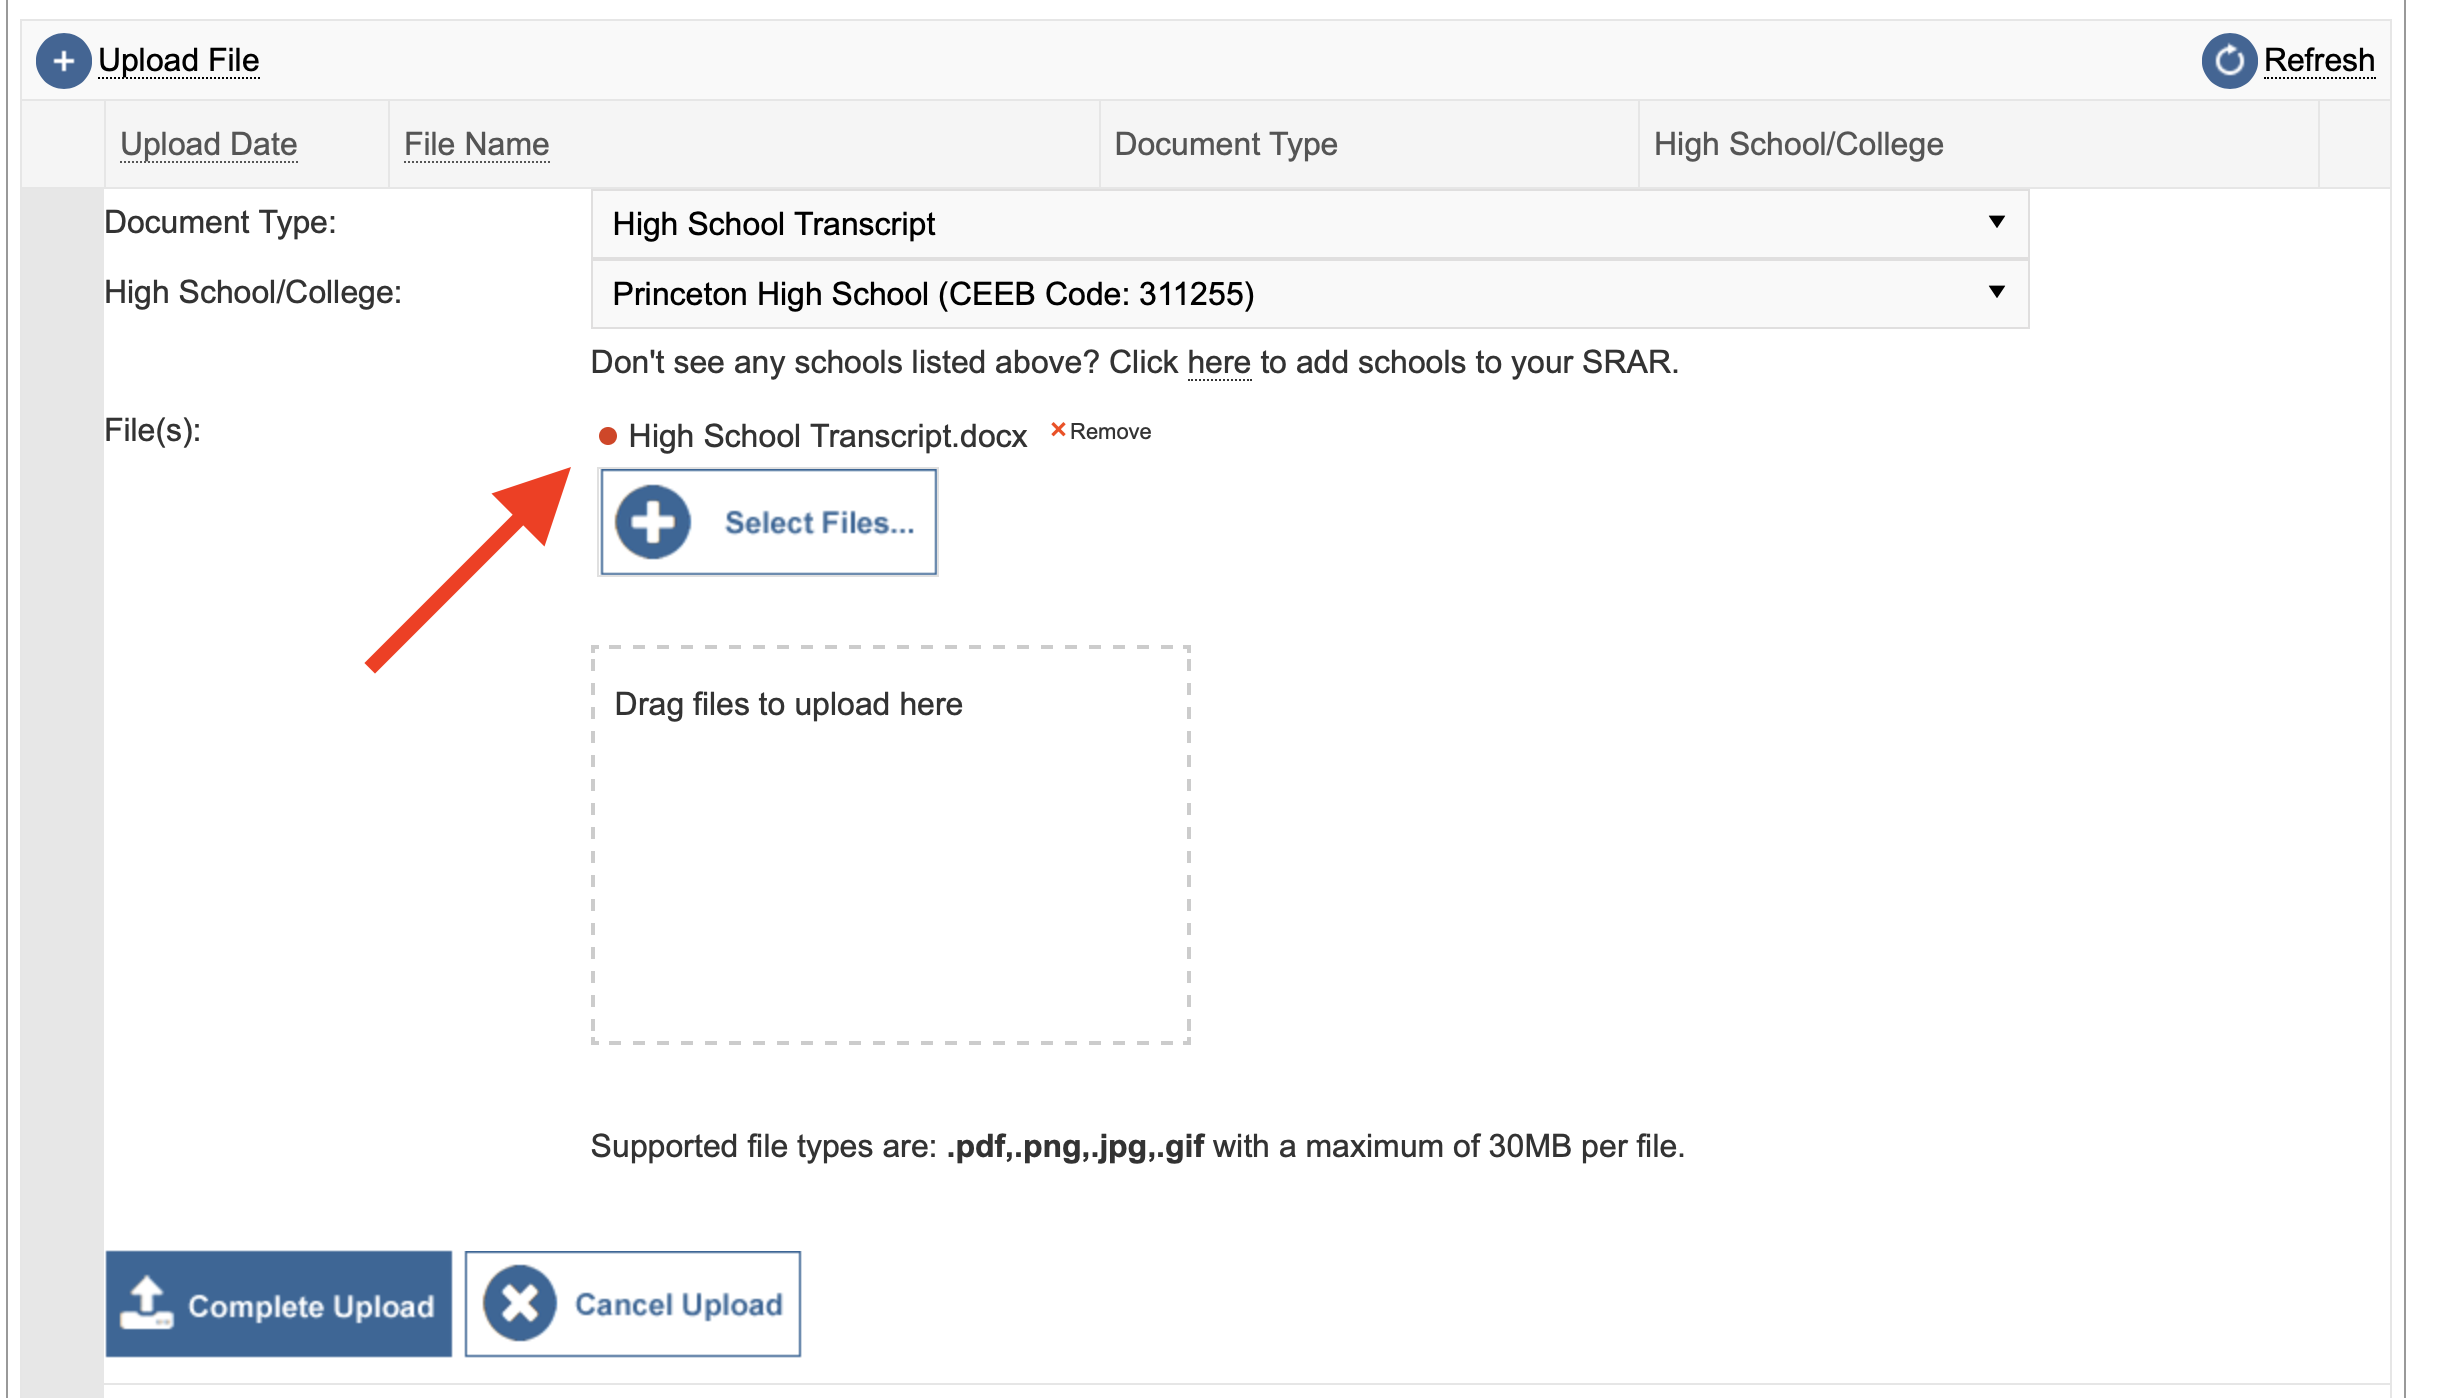
- If you see a red circle, this means you have uploaded an unsupported file type. Supported file types are: .pdf,.png,.jpg,.gif with a maximum of 30MB per file.
- If you upload a file but do not see it on screen, please click the Refresh button. It should appear shortly after that.